When I build displays I often take pictures of it along the way. I base what I add in, take out, or move around on how the picture looks instead of what my naked eye is seeing. Somehow looking at a photo of what is going on helps me see things better. By the time I am done I can have as many as 8-10 pictures and the progression is fun to look at.
September 18, 2017
September 08, 2017
July 24, 2017
Wild Ones
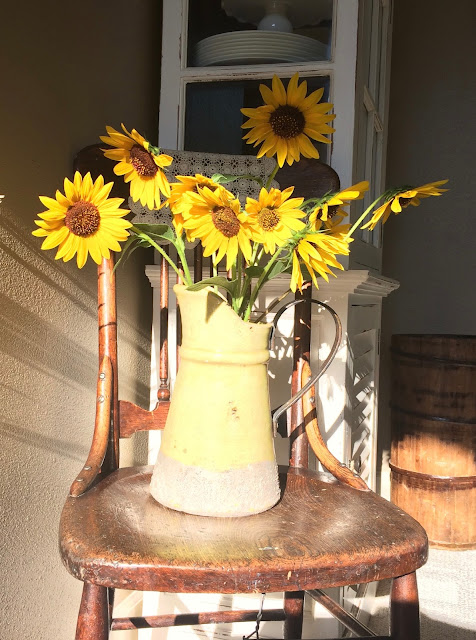
As my husband and I were taking a walk around the back side of our undeveloped neighborhood we found so many wild sunflowers growing there. The ones I had planted in my garden hadn't bloomed yet so I set out with a vase of water and some kitchen shears to harvest the ones on our walk.
For years sunflowers have graced the table in our dining room.
July 04, 2017
A picture walk in Bear Lake
Over Independence Day we went to Bear Lake. While I think I've already photographed every possible thing in town and the surrounding areas, I can't help but get my camera out to recapture shots as I take a walk.
This valley is like some time space continuum. You're defiantly entering a new place when you come here and I love it.
June 21, 2017
May 06, 2017
Blossoms
One of the funnest things about having a new yard is this spring I have had so many blossoms coming up all over the place. Most of them I know what they are and a few have me guessing.
There is some sort of flowering tree in my front yard that has berries. The blossoms are pink on the outside and white when they unfold. In early bloom the tree looks half pink and half white.
In late spring it is totally magnificent. We have nick named it the Tree of Life.
Of course tulips, and the chicks and hens are there on the right.
This plant looks sort of like a dandelion.
Lilacs: my absolute favorite.
This plant is some sort of succulent grass type. It shoots out the most gorgeous little dainty pink flowers.
We planted petunias.
We have large bunches of Catnip and it smells awesome. The bees love it and so does our cat!
Flowering grass: I have no clue what this is.
More blossoms on a tree in the back yard. It is not the same kind as in the front.
Forsythia is another one of my very most favorites.
I have not an idea as to what this is, but it's pretty.
Daffodils
This is not in our yard, but next spring I am going to plant one if I can figure out what it is. I took this photo while on a walk at a park.
If any of you know what some of these blossoms or plants are that I don't I'd love for you to tell me.
Happy growing!
April 06, 2017
Grungy Prim Egg Tutorial
I needed a tutorial on grungy eggs, but my go to blog for that project is being revamped. Now what? Well, I did what I needed to do.......figure it out and make my own for future references. Disclaimer: I am not a professional grundy egg maker or tutorial maker. My eggs were really pushing the limits of grundy almost into ugly, but in the end I am satisfied with how they look in their proper setting. Bonus: My hands smell wonderful and my house smells like I've been cooking up something very delicious.
You are going to need plastic easter eggs that have the holes in the top or bottom, ground cloves, toothpicks, a small dish, melted wax (preferably a wax that is white, tan, or brown), a cooling rack with something under it. I also found later that I needed cotton swabs and a fine sifter.
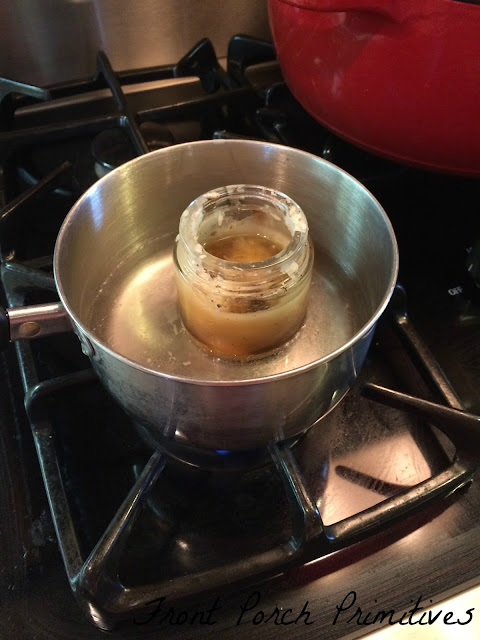
I am not patient enough to wait for hours for the wax to melt on the candle plate so if you start out with cool water and put your glass container in it to heat up all together on med low the glass won't crack. It only took 15 minutes to melt with a very slight simmer.
Take a toothpick and insert the end of it into an egg then quickly submerge it fully into the melted wax. Hurry and get it out or the egg will fill up inside with the wax.
You are not going to get great results in covering the egg unless you have a ton of cloves in your dish. I was trying to be conservative because I only had a small bottle of it. If you can, get a big bottle of cloves and make it pretty deep in the the dish and it will be so much easier for you. Working quickly before the wax sets cover as much of the egg as you can. I found that I actually needed to pick of the cloves and push them in and onto the egg. It was more like molding it how I wanted it to look. Some areas needed more while some needed less.
*Note: If you're thinking of filling up a ziplock back with the cloves and then dropping the egg into it for a good shaking like you do your chicken, don't do it. It does not work. The wax sticks to the insides of the bag and the cloves clump up.....big mess.
*Note: If you're thinking of filling up a ziplock back with the cloves and then dropping the egg into it for a good shaking like you do your chicken, don't do it. It does not work. The wax sticks to the insides of the bag and the cloves clump up.....big mess.
Sometimes wax will drip into the cloves and set. It makes it nearly impossible to cover the egg or pick the cloves to push them on if there are chunks in it. Just fine sieve them out and throw them back into the hot melted wax. If you melted your wax via stovetop and find it is setting while your working, then put the container back in the hot water for a few minutes.
By this time your workspace and hands will be a complete mess, you might be wondering what the heeeell you are doing, and your eggs might be very ugly. Just stick with it and keep creating. There will be parts of your egg that need re waxing because it set before you got spices on it. Just take a cotton swap and transfer melted wax to the spots you need to cover. Keep adding wax and covering spaces until it looks how you want it to.
The last step is to brush off all the existing spices that are not set into the wax.
See, they really will be o.k.. Once you get them in a proper setting I think they look just fine.
Good luck!
March 23, 2017
By Baby Bunny Bunting
"By baby bunting daddy's gone a hunting to fetch a little rabbit skin to wrap my little baby in."
As babies, after our baths, our father would wrap us tightly in our towels and hold us in his arms and rock us back and forth and sing this song.
I am not in the habit of creating decor like this. It's not the style I am looking for, but when I saw something like it on Pinterest the memory of my father singing this song instantly came to my mind after many, many years. I fell in love with the bunting and since it is spring and close to Easter time, it was fitting. I also think the bunnies look quite nice on the china hutch.
March 21, 2017
Vignette~ Spring has Sprung
It was Spring eve, March 19th. The kids were in bed, the kitty curled up in her usual spot, the house was dim, and there I was, ripping things apart and pulling out the flowers, bunnies, grungy eggs, nests, and birds late into the night. The house had to be transformed, I couldn't take it another second let alone another day. My heart needed spring as much as my mind and eyes did. Yes......welcome spring.......indeed.
Sometimes I wonder if I never rearranged again, if I never decorated for the holidays or the seasons, if I just stopped fussing about the mantle, the centerpieces, or the shelves if anyone would ever notice. Would my children and husband one day realize the house had been the same for months and months? Would they care that the flowers were not there or that the Fourth July decor never got put out? Would they realize that the Spring or Fall sign had been up through all four seasons? Would they care? I hate to really ask that because I think they might not. No one really notices anything when I rearrange. No one says they like the flowers, or the way the entrance has been changed. I have to tell myself that it doesn't really matter because it's something I love to do. It doesn't matter if no one likes it on Instagram or Facebook. It doesn't matter if my family cares or not. It's my way of being something other than just a mom. I have to do it for myself, so the decorating will go on.
Subscribe to:
Comments (Atom)


