August 31, 2011

It's A Tea Party

Hi!  Welcome to my tea party.  I made a big batch of tea and I am not letting any go to waste.  So, today we are going to dye Muslin, age paper, and color eggs.  It won't take too long.  You can do all these projects in just a couple of hours.  Oh ya, one more thing. Would you please take a second to comment before you leave the party:)  I would love to know who was here.  It's a great way for me to meet new blog friends and to talk with old ones.  Thanks, and have fun with your hands in the tea.

 Tea dyed Muslin
Add 2 tea bags for ever 1 cup of water.  4 cups of water and 8 tea bags will do 1 yard of fabric.  Boil water and add tea.  Let steep 5 minutes.  Drop your wad of fabric in (some add strong coffee as well at this point) and saturate moving it around until your desired color comes out.  Without wringing it, put it on a foiled covered baking sheet and put in 250 degree oven for 15 min.  Baste it often.  Flip it over and do the same on the other side.  Keep flipping (and basting) every 15 min. until you see a mottled affect. *Ignore the looks you get from your family when they see that you are cooking fabric.*  When done, rinse it out and throw it in the dryer on the highest setting until damp.  Then iron on your highest setting. Then you are done.  If you don't like the look, steep some more tea and do it over until it's right.
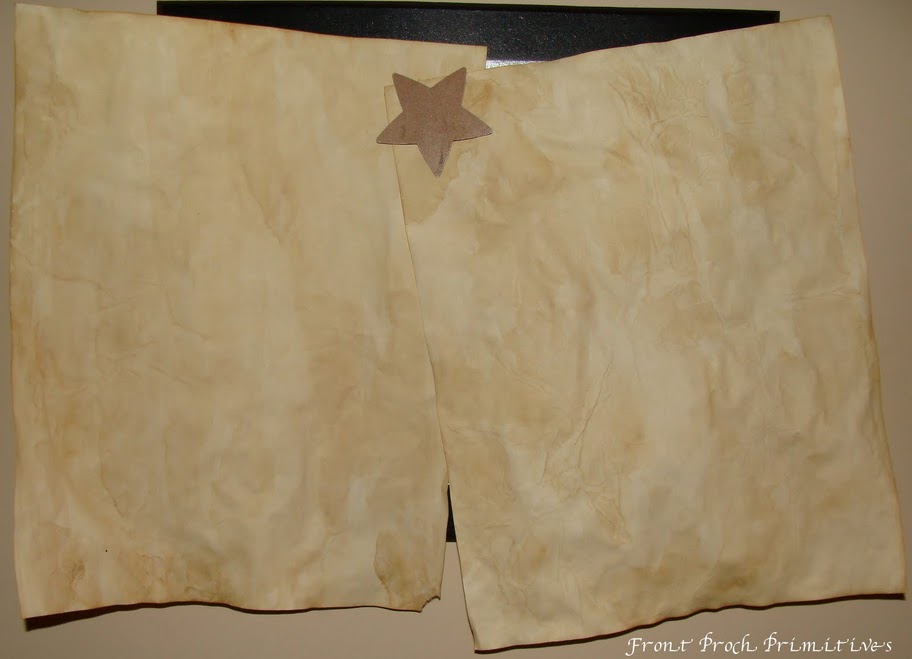
 Aged Paper
Heat oven to 250 degrees or just leave it on after you have dyed your fabric.  Line a baking sheet with parchment and lay your copy paper or card stock on it.  Brush with strong dark tea, saturating both sides of the paper.  A little pooling is ok in some spots.  That makes the darker blotches on the paper.  Put it in the oven until it is dry.  Watch carefully.  Again * ignore the looks given because you are baking paper* If you don't like the look of the paper, re-stain it with the tea and dry until desired affect comes out.  Iron it if you are running it through your printer later.

Tea colored eggs
Sanitize your eggs with soap and water (unless you want to get sick):{ With a straight pin, poke a hole on both ends about an eighth of an inch.  Shake and shake and shake until you start getting egg white out.  Then (don't gasp) blow out the rest.  I cover the part I am put my mouth on with a paper towel.  It can be quite an exercise to blow it out, but never give up.  Keep shaking as you go.  Rinse out the egg and blow until clear water comes out.  For brown eggs, roll evenly in a mixture of 2 bags of tea to 1 cup water until desired color is achieved.  For green and blue eggs, add 1 drop of blue food coloring and 1 drop of green food coloring to one glass of water.  You can play around with the coloring yourself.  After the eggs are colored stand them up and let them drain.  For the spots, use brown acrylic paint.  Lightly run a old tooth brush through a small amount of paint and touch the spots on the eggs. Stand them up again and let dry.


August 29, 2011

School's Starting

I have always been captivated by how school must have been for children in the early 1900's.  I remember watching "Little House On The Prairie" as a young girl. The school and recess scenes were always my favorite.  As my own two children get ready to return to school this next week, I think the anticipation must have been nearly the same back then.  


"Happy School Year"

August 27, 2011

Primitive Moon

The moon put on a spectacular show last week.  I can't help but be a deep thinker sometimes.  I love what the moon represents.  The past, present, and future all brought together.  Something I have in common with every human being that has walked or will ever walk the earth.  We have all seen and been amazed at the same moon.  It may be the most primitive thing we will ever look at.  Have a good weekend.


August 24, 2011

Hooray!! Wooden dish makeover

Two things to celebrate today!!  First: Hooray, I have 30 followers who support me in my efforts at this blogging thing.  It's not easy, so thank you.  Second: With some help of some very nice forum friends Red Shed Vintage and Suzy Lowan, I remade my very first dish.  Yeeeeeah!.  As I was pulling it all together all I could think was "Holy crap...... It worked"!!!   It's not professional by any means but I am proud of my accomplishment.  Here's what I did.

This is what the dish looked like before.  

 I was told to use acrylic paint.  I just wanted a small amount because I didn't have too much to do so I opted with the tubes.  It worked out fine.  Then I was instructed to use a walnut stain to finish it.  There are a lot of stains out there.  Who knew?  I chose this because it was a little cheaper.

 I did about 3 coats of paint letting each one dry thoroughly  before I put another on.  

 Red Shed Vintage gave me the advice to leave the inside unpainted to keep the "natural" feel to the bowl.  I am happy I did.  I just covered the very edge of the top with paint.  Let it sit and dry completlety
before starting to sand. 

 I looked at a lot of pictures of other dishes and bowls to see how and where to sand it.  I was skeptical of my work at first.  I thought it looked like leopard spots or something.  Sanding proved to be harder than I thought.  I would use a medium sandpaper.  Mine was too course.  It hurt my thumbs:(

 I lightly sanded the inside down and Suzy told me to stain it.  Spray it on evenly then wipe it off with a soft rag before it dries.  I found that if you use a courser rag it will wipe lines into your paint.

 Then I sprayed a couple of coats of stain on the back and wiped.  It turned the brick red into a beautiful color and left my sanded areas not so obvious.  This is when I became really excited.  I couldn't believe how nice the stain made it all come together.


So here it is all done.

August 22, 2011

A Hint Of Fall

Good Monday morning to everyone.  Was it ever hot this weekend.  I rescued a few of my Sunflowers from the heat and brought them inside for the family to enjoy.  We planted a ton along the edge of my garden along the fence a few years ago.  I have never had to plant them again.  In the fall and winter we leave them up for the birds and in the spring we take the stalks down and wait for the dropped seed to grow.  Somehow they spread all over my garden like a sea of Sunflowers.  We carefully transplant what we want along the fence again.  I love the multicolored ones.  A hint of Fall.  I hope you enjoy.


August 19, 2011

Handmade Chair

Some people are visited by what they call "Trash Gods".  I have yet to be bestowed by one.  I am, however, surrounded by generous people.  This beauty was given to me last week and I giggled with excitement all the way home.  Oh how I fell in love with this piece.  I gently cleaned it with a baby toothbrush and a soft rag.  Then I saw it come to life as I rubbed Old English on it.  I love the woodwork, the distresses, and the wires.   I love that it is well over 100 years old.  Now off to find a place for it.

Before cleaning 

After cleaning

August 17, 2011

Hidden Treasures


My mother has hidden treasures tucked away in all corners of her house.  She doesn't realize it but primitive runs in her blood and it shows if you look closely to things in her home.  In this first photo I grabbed five different items from five different places in her house to create the picture display.  The last two displays are her own.  I am, however, coveting the drawers and old books.

August 14, 2011

Wonderful Woods

Guess what I found in my crawl space? Yes!!! My father brought back a huge set (for five) from the Philippines. He was getting rid of them so I snatched them up and put them in storage. At that time I really had no idea what I was going to do with them. I reserved as many as I needed for my family and this is what I have left over to work with. What I really need is some ideas on how to display them.  If any of you have any good ones please share!! 

August 10, 2011

Primitive American Folk Art

I realized the other day that I sure have a lot of houses within my house and towns on my walls.   I really enjoy looking at Primitive American Folk Art.  One can get lost in thought while looking at some of these amazing prints.  It's like having a story told to you through detailed pictures.  Stories of a time when things were simple and uncomplicated and quiet.

Charles Wysocki

Unknown Artist

 Billy Jacobs

 Heronim

 Heronim

Unknown Artist

Linda Nelson Stocks (Calender-can't wait for October)

Diane Pedersen

Charles Wysocki

(My favorite) "He That Tilleth His Land Shall Be Satisfied"
Unknown Artist- 1850


August 08, 2011

Whisk Broom Ideas

I can't stop looking at whisk brooms.  Is that crazy?  I had to pull myself away from the computer while looking for photos because I kept thinking "just one more, just one more".  I wish I could reach in and touch and run my fingers through the bristles. I'd like to feel the threads of the wires wound together.  I want to wrap my hand around the wooden and metal handles to feel their weight.  Then maybe, just maybe, I'll want to sweep.  I hope you enjoy these pictures and displays that others have put together.  I know I do.

Country Living